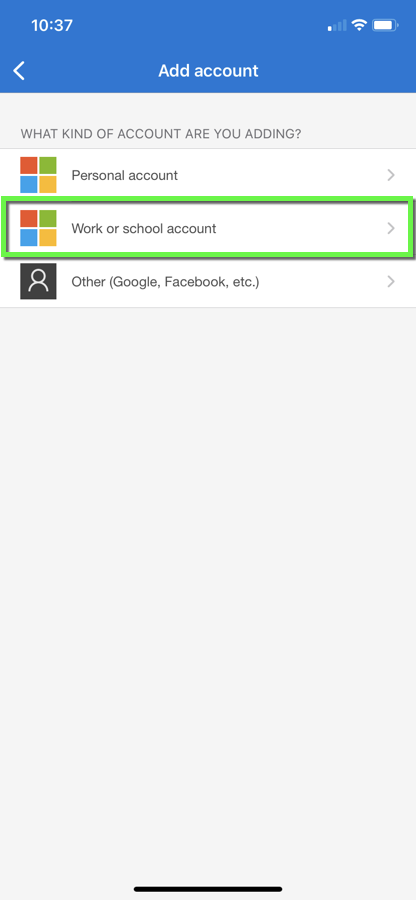
Microsoft 365 Multi-Factor Authentication - Register and Set Up Microsoft Authenticator App

Step 1

When prompted to register for MFA, click Next. Once you are invited to use MFA, you will have 14 days to register.

Please note: If you already set up MFA with a phone number or other method and are adding the Microsoft Authenticator app to your account, skip to step 3

Step 2

OIT's recommended method for authentication is Microsoft's Authenticator app. Download the app from the link on your screen or visit Microsoft's website to download automatically (shown on next 2 steps). When downloaded, click Next.

Step 3

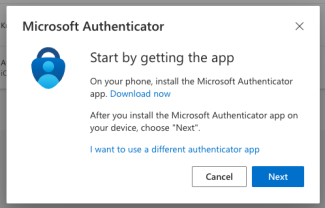
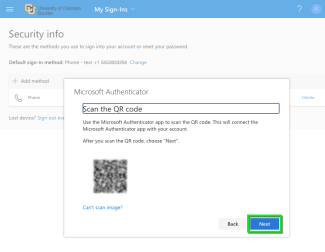
Visit the Microsoft's Authenticator App page for direct links to the Apple and Google Play app stores, or to get a download link sent directly to your phone. When you open the Microsoft website, you'll see several options for downloading, including a QR code you can scan with your phone to download the correct app. 

Step 4

The app will show up with a blue lock on a white background. 

Step 5

Once downloaded, open the app on your phone and select Add Account.

Step 6

Select Work or school account.

Step 7

Select Sign in or Scan QR code (this tutorial shows the QR code method, but the login process is similar). 

Step 8

Scan the QR code using your app and click Next

Step 9

After signing in or scanning the code, you will be prompted to approve the sign-in on the app. Select Approve

Step 10

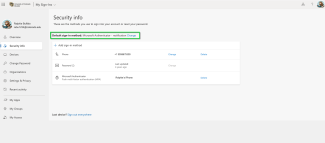
The Authenticator app is set up as your default sign-in method. You can update your settings at any time on the My Account page of your Microosft account. 

Use our Find and Update Security Info tutorial to add additional sign in methods (e.g. a back up phone number) or if you change devices and need to register your new device. 

Please note: You may be prompted to re-authenticate to multiple Microsoft 365 servers after adding a new authentication method (e.g., Teams, Outlook).