Step 1
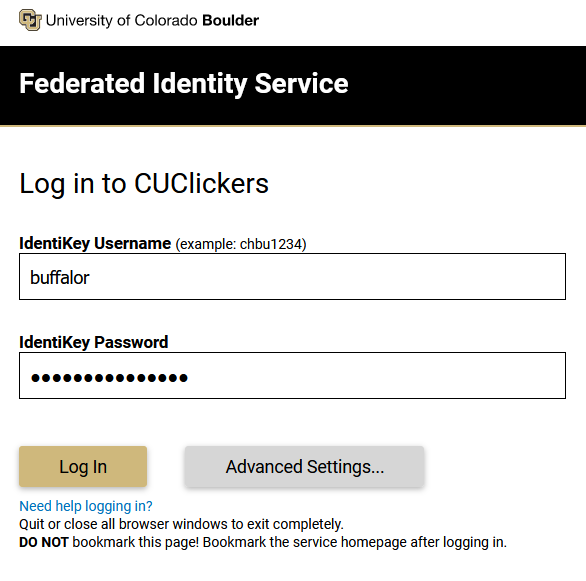
If using the iClicker website, go to the iClicker login page and click to open the Select an Institution drop-down menu.
If using the mobile app, log out if you're already logged in. Then, on the login page, select Sign in through your campus portal.


Step 4
If you already have an iClicker student account, select Yes to link to an existing account.
If not, select No to create a new account, then proceed to Step 6.
![We didn't find an iClicker account associated with your institution email. [email address] Do you have an iClicker account using a different email? Yes. No.](https://data.colorado.edu/sites/default/files/styles/max_325x325/public/ClickerSSO_2024_4.png?itok=4EAWWRbQ)
![We didn't find an iClicker account associated with your institution email. [email address] Do you have an iClicker account using a different email? Yes. No.](/sites/default/files/ClickerSSO_2024_4.png)
Step 5


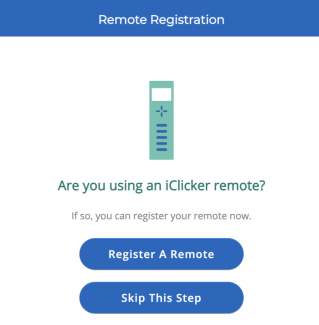
Step 6
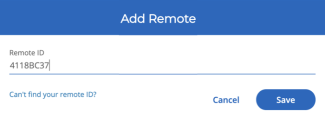
If you have an iClicker remote, select Register A Remote.
If not, select Skip This Step, then proceed to Step 8.
Note: To add an iClicker remote later, visit Add an iClicker remote ID to a student account.

Step 7
Step 8
If this is your first time using iClicker, your classes may not appear until your instructor syncs the roster again.
If you discover that you have more than one iClicker account, follow the steps in our multiple accounts tutorial to ensure your grades post to your CU Boulder account.